



Create coherent interior signage for your offices with NOVÉLINE
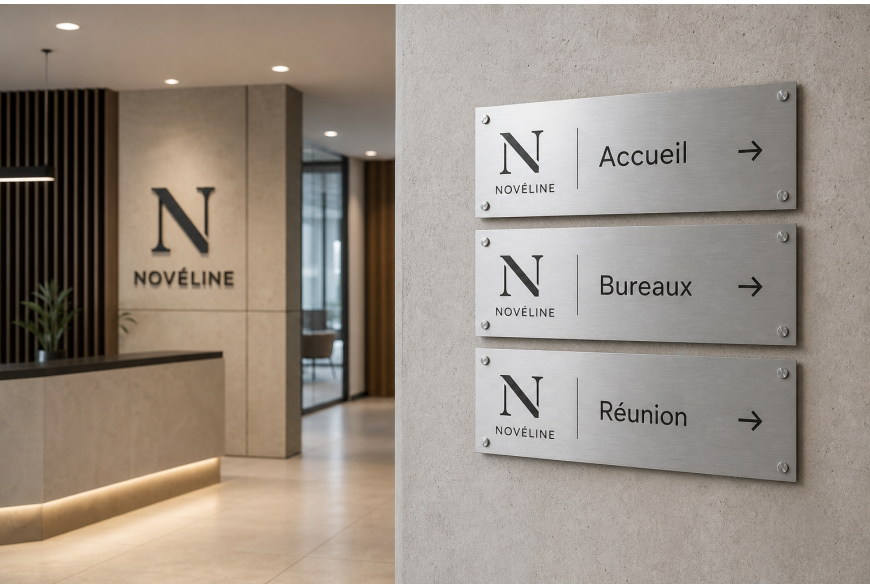
Good interior signage guides visitors, reinforces brand identity and makes life easier for teams. For a professional reception — as in the hypothetical example of NOVÉLINE with brushed aluminium plates labelled Reception, Offices, Meeting and a monogram N — visual coherence and quality of execution are decisive. This article provides concrete advice on choosing signs, ensuring legibility, selecting materials, preparing surfaces and mounting techniques.
1. Define a clear visual identity
Before ordering plates, formalize the rules that will ensure consistency: color palette, logo version (here a monogram N), treatment of labels (Reception, Offices, Meeting), any pictograms and the desired level of detail. Gather these elements in a short signage guideline: it will serve as a reference for printing, cutting and installation. Also consider scale: what works on a door may not be suitable for a large lobby.
2. Choose appropriate materials and finishes
For a premium, durable finish in a reception area, brushed aluminium is a common choice: contemporary appearance, durability and a good result for sober visuals. You can combine aluminium with a Dibond backing or an acrylic panel to achieve depth or color contrast. Prefer anti-smudge finishes and treatments that withstand the wear from handles and high-traffic areas. Also consider cutting and machining options: the monogram N can be engraved, cut in relief or applied for a branded effect. Depending on use, lighter supports (expanded PVC, PMMA) may be sufficient in less exposed areas.
3. Legibility: typography, contrast and hierarchy
Legibility is essential. Choose a sans-serif typeface that is stable and readable at a distance, and define a hierarchy between elements (title, subtitle, pictogram). Ensure contrast between text and background: dark text on brushed aluminium or cut lettering will highlight the labels Reception, Offices, Meeting. Limit the amount of information on each plate: a clear name and, if needed, a pictogram are often enough. For accessibility, avoid very thin fonts and reflective backgrounds that impair reading from different angles and lighting conditions.
4. Surface preparation before installation
Successful installation starts with proper surface preparation. Clean the area with a suitable product to remove dust, grease and fingerprints; let dry. On painted walls, check the paint condition (sand if necessary) and repair visible defects. For plasterboard, ceilings or concrete walls, identify the material type to choose anchors suitable for drilling. Prepare an installation template (kraft paper or cardboard) to position the plates and validate alignment and height before drilling.
5. Fixing: exposed screws, caps and alternatives
Fixing should be both aesthetic and secure. Exposed screws and standoffs give a professional look, particularly on brushed metal plates where screws can be chosen in a matching finish. Screw caps provide a smoother appearance if you prefer mounting without visible elements. For fragile surfaces or those without load-bearing support, favor certified structural adhesives or mechanical systems suited to the substrate, taking compatibility with paint and eventual removal without damage into account. Always perform a test on a sample or discreet area. For plasterboard or hollow materials, use appropriate anchors; for concrete, use expansion anchors. Accurately locate anchors to avoid damaging cables or pipes behind the wall.
6. Technical options: lighting, NFC and connections
Integrated lighting (LED trim, backlighting) can improve legibility in low light and give character to panels. For electrical connections, hire a qualified person: do not perform the connection yourself and do not follow detailed electrical procedures here. Regarding integration of technologies like NFC, here is a candid view: NFC can be useful to provide supplementary information (floor plans, contacts) without touching a screen, but it requires consideration of durability, data security and actual usage frequency. Assess whether your users have the necessary tools (compatible smartphones) and whether the added value justifies the extra cost and maintenance.
Designing coherent interior signage requires planning: define the guidelines, choose suitable materials (for example brushed aluminium plates with a monogram N for a strong identity), guarantee legibility and carefully prepare installation. Use templates for alignment, adapt the fixing method to the wall type and test finishes. Typical lead time can be presented as 6 to 10 working days depending on the project after BAT approval, to be confirmed in the quote. For any electrical connection, hire a qualified professional. By proceeding step by step, you will improve visitor experience and strengthen your company's image.